
Large Figure in Porcelain/White Stoneware Clay
- Jan 20, 2018
- 4 min read
This was the last large figure started in the set of four I decided to make as a group. This time I chose Valentine's Clays PF700G - a mix of white stoneware clay and porcelain and grog. It fires really white in hight temperatures but is a pig to handbuild with. It is worth it if it works out though. I wanted a white body as I'm planning to use a fake celadon over this and need a white body for that.
Anyway, here is my making process:

1. Starting off with the first couple of coils following the outline drawn on the paper.

2. This time I've left it to last to close up the limbs so that I had the longest time possible to reach the inside the smooth out all the coils and also the ensure the most even drying out process.

3. Using little flat pinch pots to close off those limbs means I cannot at this stage smooth out the join from the inside. That will have to wait until I can turn it over after a bit of firming up.

4. Because of the shape it was quite complicated to build the bed of support before turning over the shape to prevent it from snapping in half. This as especially important as this clay has so little internal strength and plasticity. Damp paper towel soften up the rim before I start to add new coils.

5. Nearly finished for the day I decided the add damp paper towels to the bottom drier parts of the shape to help even out the moisture content over night. WHAT was I thinking?!!! I must have been tired.


6. Water weakens the form and with the heavy weight of the clay body on top the shape showed up a few pressure cracks over night. I nearly binned the whole piece at this stage. Instead I decided the mend the cracks as well as I could.
7. The most ungainly part of this figure was a large bulbous profusion, which reminded me of a large octopus nose. This was also putting the most stress structurally on the piece. So I decided to cut it off and reduce it in size.


8. Another change to shape I made was the the correct the concave shape of the 'head'. It just didn't feel right as all the other shapes are convex. The only way I could think of doing it was by rather brutally inserting at an angle a long flat handle of a spoon to push the clay outwards. Again, I wasn't sure whether the clay was going to forgiving to such a violation.
9. Once the final shape was done - reminding me a bit of a trussed up chicken, I must admit - I spent some time refining its shape and surface. I allowed for a very, very slow drying process: From finishing the building process to refining the surface I allowed three weeks to equalise the moisture. After burnishing until it was bone dry allowed five weeks of slow drying.


10. To my total amazement NO cracks had opened up so I decided to risk it and a few areas of water etched decorations so that my piece had a bit of texture in the end.

11. Even after bisque firing no cracks had appeared. I did not think that would happen.
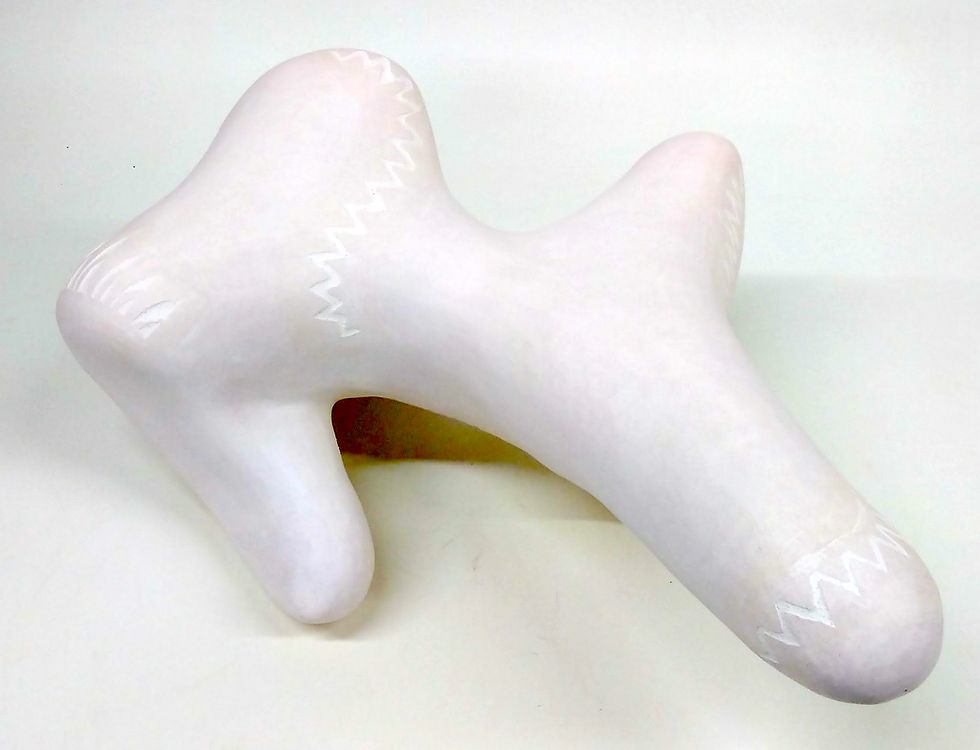
Now the real decorating could start. I have done some little test pinch pots and knew that I wanted created a monochrome textured decoration over which a green celadon like glaze could go. The idea is that the glaze would pool into the recessed areas of the textured decorations and be darker. As my project is about cross cultural or multi cultural influences I decided to combine the celadon glaze, which originated from China, with patterns from the Pueblo Indian from the South-West USA.
12. Firstly I drew a pattern with latex masking fluid. This can be tricky as when turning the figure over the latex tends to stick the areas where it is in contact with the table and has the tendency of pulling off.

13. Next I flooded the figure with white underglaze.

Because of the porosity of the clay it sucks in the moisture of the underglaze and a thick layer builds up quite quickly on those surfaces.

14. Once the underglazes are dry enough not the smudge I pull off the latex pattern to leave the underglaze pattern on the body of clay. I thought this was going to be a one to two hour job but it took me nearly seven hours. That is a bit much, even by my patient standards. I think leaving the underglazes to firm up over night was a mistake. It would have been easier if they were a bit more moist.
On the left, you can see the two different types of texture now on the surface of the clay.


15. In order to harden and set the underglazes I fired it to 1000°c.

16. Out of the kiln I have to be very careful to now place the figure on a hard surface as the decoration is quite brittle and can shell off easily.

17. Next step will be to glaze this beast. It will not be an easy job to do. I may spray it instead of pouring or dipping. The glaze, which is not a real celadon glaze in the traditional sense but one firing in oxidation coloured with copper oxide, has the tendency of being very runny and cracks when too thickly applied.


Comments